Saturday, 27 December 2008
red robot download
http://www.b3ta.cr3ation.co.uk/data/jpg/bigred1.jpg
http://www.b3ta.cr3ation.co.uk/data/jpg/bigred5copy.jpg
http://www.b3ta.cr3ation.co.uk/data/jpg/7454.bigred2.jpg
http://www.b3ta.cr3ation.co.uk/data/jpg/7532.bigred3.jpg
http://www.b3ta.cr3ation.co.uk/data/jpg/7753.bigred4.jpg
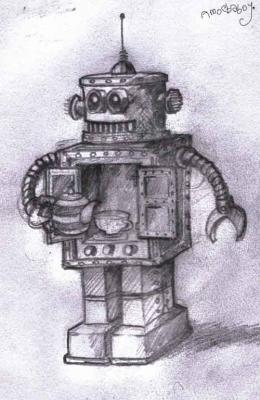
model of a robot who made his first appearance in space monkey 2
Saturday, 11 October 2008
been a bit busy latley
ages since my last post, things have gone a bit mad in the amoeba household.
not been able to produce much stuff latley because of a new job.
anyway i started on a new space monkey movie a few weeks back and its looking good, but dont hold your breath, it takes ages to finnish one, finally getting to grips with the editing software so this ones going to look extra lush.
same sort of stuff as before with giant robots, hotrods, and a killer surf soundtrack.
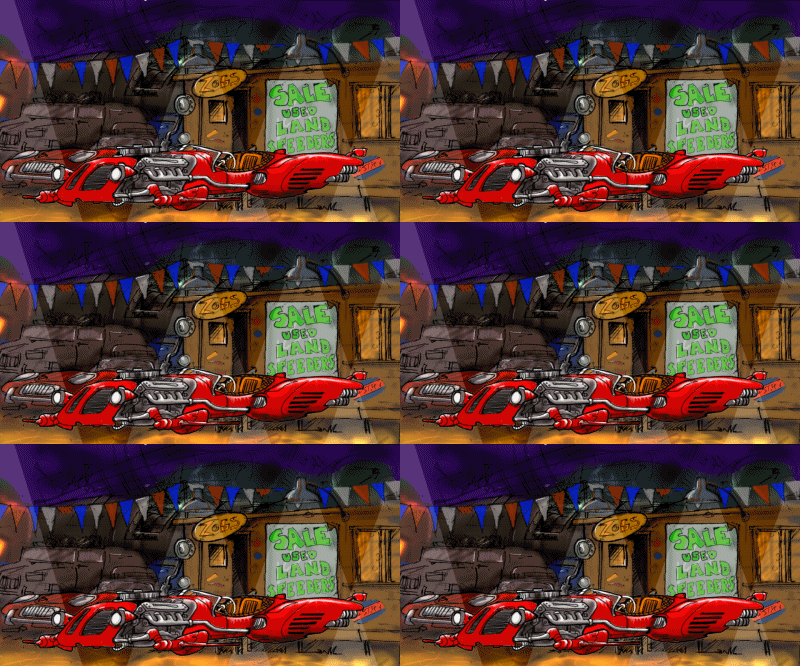
the story requires a dodgy second hand car dealership, i suppose they all look a bit like this whatever universe you might inhabit .
Sunday, 6 July 2008
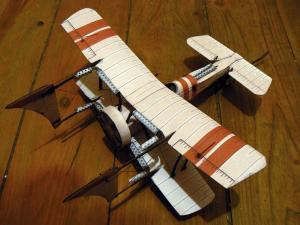
cardboard steampunk x wing
its all for free, so if you can make a donation however small please do so it would be much appreciated because i am totally broke.
Click for bigger (117KB)
www.b3ta.cr3ation.co.uk/data/jpg/xwing2cutoutbiplane.jpg
www.b3ta.cr3ation.co.uk/data/jpg/xwing1cutoutbiplanekitcopy.jpg
www.b3ta.cr3ation.co.uk/data/jpg/xwing3cutoutbiplane.jpg
its all available for free but theres no instructions yet but i will advise people its not easy, strengthen the struts with thin wire or make them from wood, coffee stirrers are perfect.
i will try to produce an instruction sheet but i have little time at the moment.
please leave a comment here if you build one i would loved to see them.
Thursday, 19 June 2008
Sunday, 1 June 2008
space zombie
i wanted to create something a little more sinister for my next project, the idea for it initially was a kind of ghost ship with a long dead astronaut at the wheel of his craft. a bit like the old aurora horror kits forgotten prisoner.
but then i thought naaaah a space zombie would much be more fun.
the cockpit tub is made fromm an acrylic tumbler, i will be using this to create lighting efects later on, in the first pic you can see a green halo and two lights inside the helmet it has two tiny bulbs inside that shine into a green plastic hemisphere embeded in the helmet.
the pilot, steering column, and cockpit detail is sculpted from white milliput epoxy putty on a wire frame.
Monday, 26 May 2008
Saturday, 24 May 2008
Friday, 2 May 2008
cardboard steampunk x wing
a little diversion from the robot stuff.
nearly finished just a propeller to make now, i will post links so you can download it and make it yourself
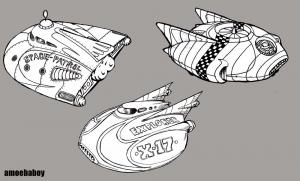
heres the illustration that started it all, there are more of my steampunk starwars designs over at deviantart if you want to check them out.
http://amoebabloke.deviantart.com/gallery/
Thursday, 20 March 2008
johnny rocket pants first look
Wednesday, 19 March 2008
johnny rocket pants
Friday, 7 March 2008
Monday, 3 March 2008
a few final touches still to do but its almost there i added some rivet detail to the bands and did a bit of weathering.
the boot eyelet on the side of the dome was taken out and replaced with a brass and copper lens arrangement, this was fabricated from bits of tube with a tiny domed glass lens at the tip.
finally got rid of the ugly steel rail on the left hand side and replaced it with a water level glass, more like the one in the original illustration.
i also found some tiny glass ampules, the bases of which made excellent glazing for the big lens and the steam gauges, i never really liked the plastic ones they were just somehow wrong.
i used a dremmel to grind the lenses they were a devil to get right
\
Sunday, 2 March 2008
Friday, 29 February 2008
more of the making
i cant remember exactly how long it was before i returned to the r2 project, probably a couple of months, i completely lost the thing in amongst the huge pile of junk/tools/tat/toys/Cd's/scooter bits etc that steadily grows around my computer.
when eventually i decided one day to have a tidy, the dome showed up so i stuck it in a box along with a load of other bits and pieces that i thought might be useful.
a few days later i raided one of those big coffee machines you get in the motorway services, those little wooden stirrers were perfect for the lagging planks on my boiler .
it just so happened i had a length of steel pipe out in the yard so i hacked a piece off with my angle grinder,and by pure fluke it fitted the dome perfectly, this was a good sign.
i then glued the planks onto the steel using cheap super glue, soldered together some tiny steam gauges and made the front panel.
thick copper wire was used for the pipework with thin copper sheet brackets i also cut tiny copper washers for where the pipes went into the body.
i also gave it a couple of coats of varnish, bad idea it was horrible i eventually stripped it all off and did it again.
then i turned my attention to the underside, beaten out from a copper blank similar to the brass one i used for the dome, it originally had a round base with sides at right angles , i just flared out the sides till it fitted the body.
some of this junk you can see on the bench is stuff Ive had lying about for years and years.
grilles and meshes were added along with a brass firebox door i also did a dry run with the legs just to get the proportions right.
a long drawn out period of messing about with leg strut configurations followed, it took about a week to get things right, i also discovered a prime piece of brass pipe out in the yard in the form of a blowlamp pump, this eventually became the topmost tube in the leg assembly.
my fingers were scorched and blackened by metal polish, but things were really beginning to take shape.
Monday, 25 February 2008
this is how the r2 dome was made
the illustration that started it all was made for the robots image challenge on b3ta.com.
a few days later i came across a pressed brass blank that i had picked up somewhere so i thought i might have a go at beating it out into a dome.
a slow process of heating and beating, i used an ordinary ball pein hammer and a wooden stump with a slight depression in it for an anvil.
at this stage i use a file to identify all the high spots, and carefully hammer them out.
the beating out process took quite a while it was a long time before i was happy with the profile, but finally i called it a day, the top by now was paper thin from all the beating and filing.
on to the next stage, marking out the panel lines, and drilling loads of little holes in lines to make bigger holes i then used needle files to neaten up the edges.
then i started adding some detail, the large lens body is a piece of brass light fitting the inlaid pieces are medium and fine wire mesh with copper and silver pipe detail behind them,other materials include brass boot eyelets and lead sheeting.
work then stopped for a while, a combination of work and domestic stuff meant i had to set the project aside.
Saturday, 23 February 2008
my first foray into the blogging world
Friends of mine, quite a few of them in fact have said you must start a blog, well yes here i am and this is my blog, and here's what I'm up to this very minute
Click for bigger (104KB)
ive been working on this project off and on for quite a while now, regularly updating its progress on my deviant art pageshttp://amoebabloke.deviantart.com/, then quite suddenly things started getting strange.
a link was posted on boingboing and the thing went mental five and half thousand views in one day and still rising, and quite a few offers of hard cash.
i still haven't decided what to do with it, i haven't even finished it yet.
Subscribe to:
Posts (Atom)